 Salesforce
Use Suger to sell and co-sell within your Salesforce
Set up Integration User
We need a integration user (aka. integrator) to access your Salesforce data. We use OAuth 2.0 Web Server Flow for authentication, and communicate with your Salesforce instance using REST APIs on behalf of the integrator.
When creating the integration user, please use either the Salesforce or Salesforce Integration license. We recommend using the Salesforce Integration license with the Salesforce API Only System Integrations profile.
Please also make sure you use a correct email address and can activate the user.
After creation, please assign the following permissions:
- The
Suger Integrator (Salesforce Integration License)permission set. ReadandView Allpermissions on the following standard objects:- Account
- Contact
- Opportunity
- Quote (if enabled)
Get Connected
After the installation, perform the following steps so that Salesforce and Suger can talk with each other.
Allow Salesforce to Access Suger
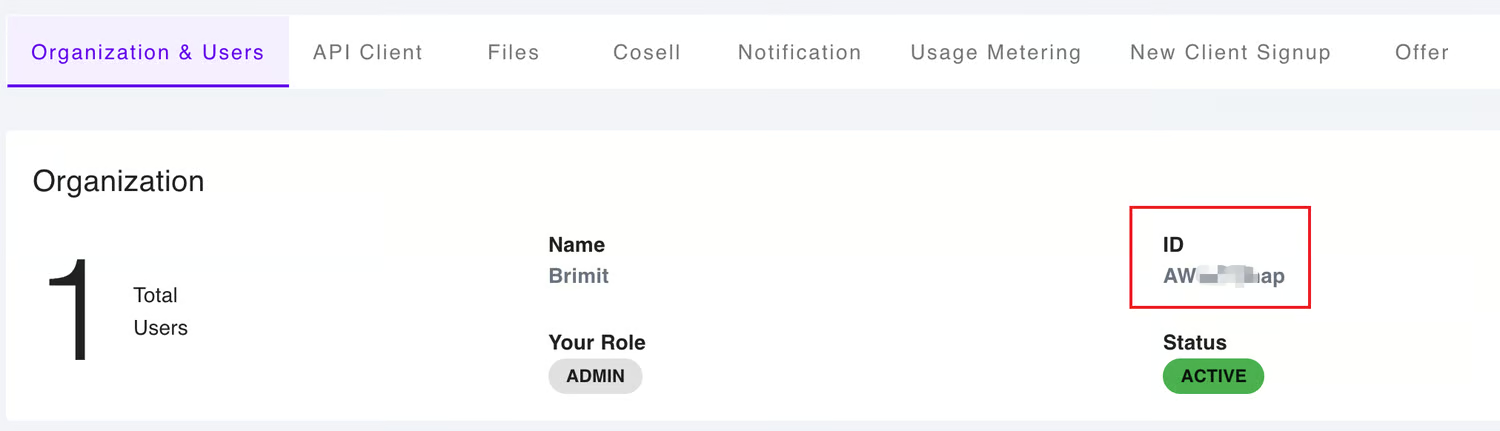
- Get your Suger Organization ID and API Key
- Organization ID - This can be found at Suger Console Settings (https://console.suger.io/settings)
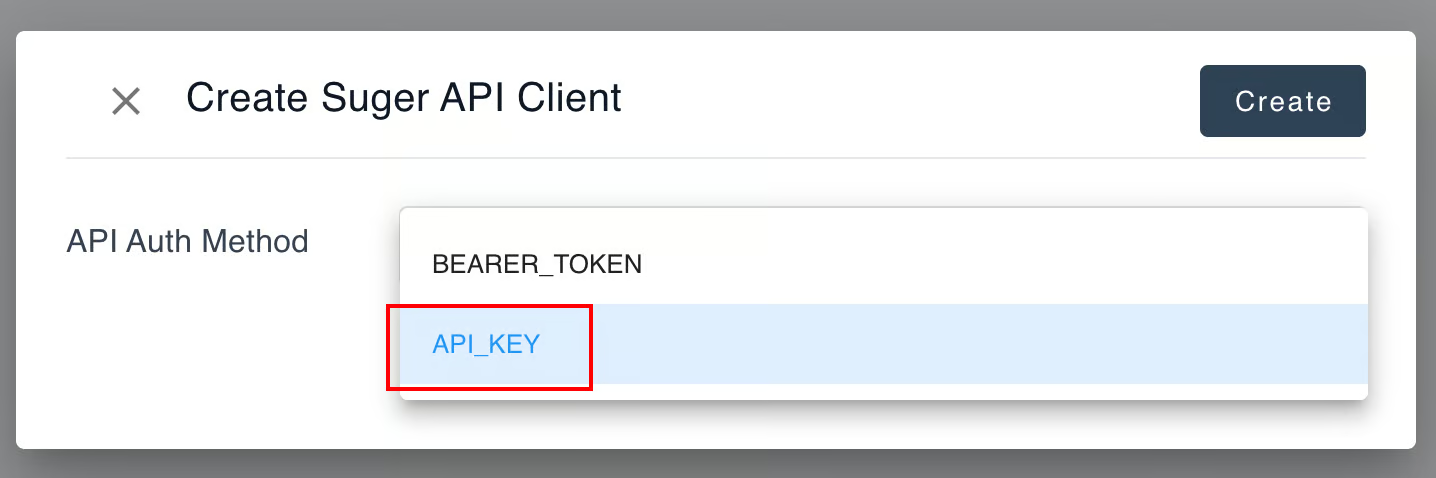
- API Key - Follow the instructions at API Client
- Please make sure to use the
API_KEYas opposed to theBEARER_TOKEN
- Please make sure to use the
- Organization ID - This can be found at Suger Console Settings (https://console.suger.io/settings)
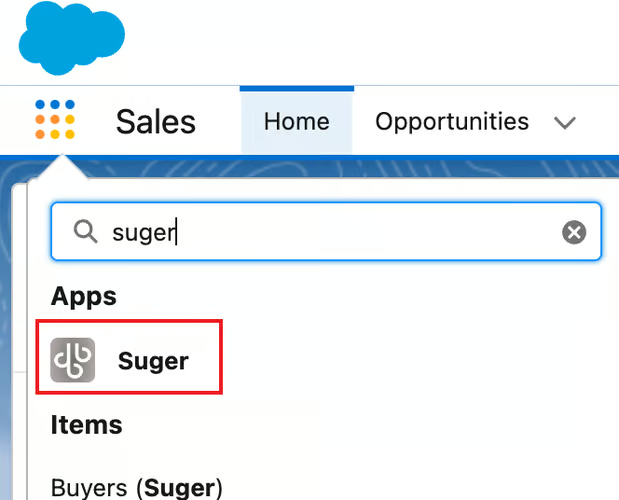
- Input the organization ID and key on Suger App.
- Go to the Suger app on Salesforce
- Go to "Settings" and fill in the required information and click 💾Save
Please ensure the API Key doesn't contain any trailing spaces.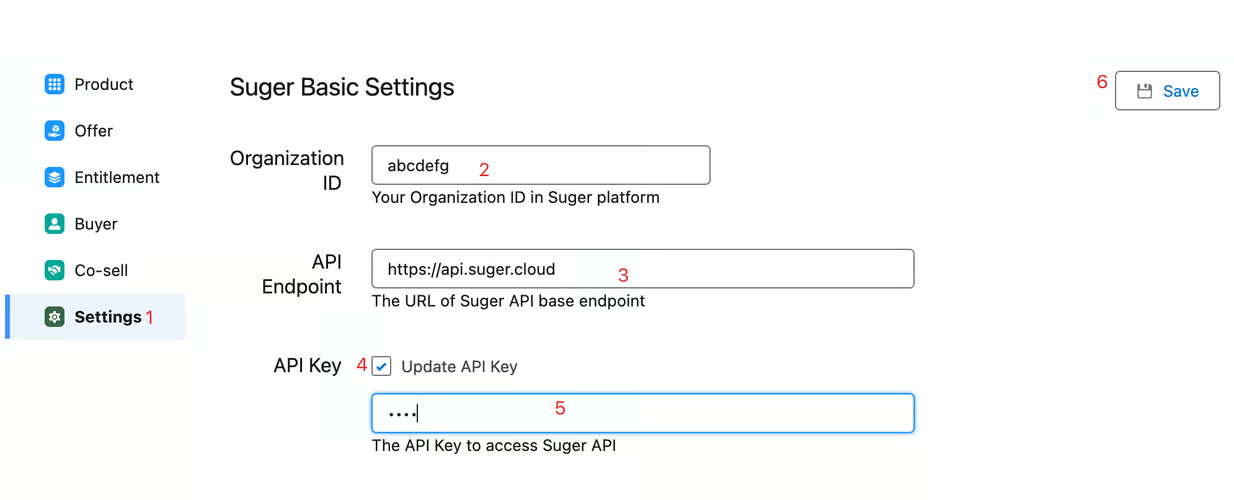
- Go to the Suger app on Salesforce
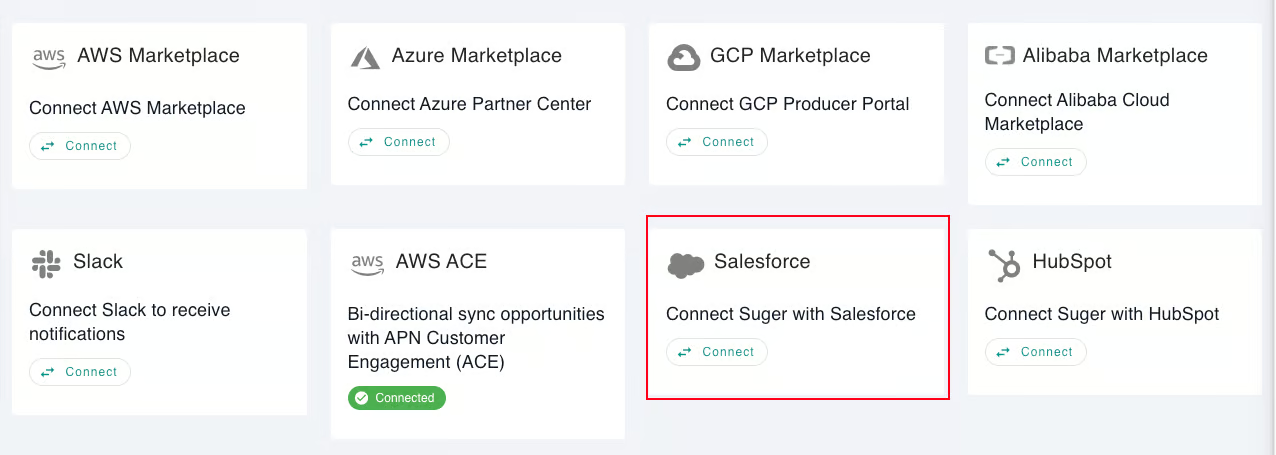
Allow Suger to Access Salesforce
Go to the "Integrations" page in your Suger Console, locate "Salesforce" and click "Connect":
- Before you proceed, we suggest you log out of Salesforce just in case the browser cached your current session without asking you to log in as the integrator.
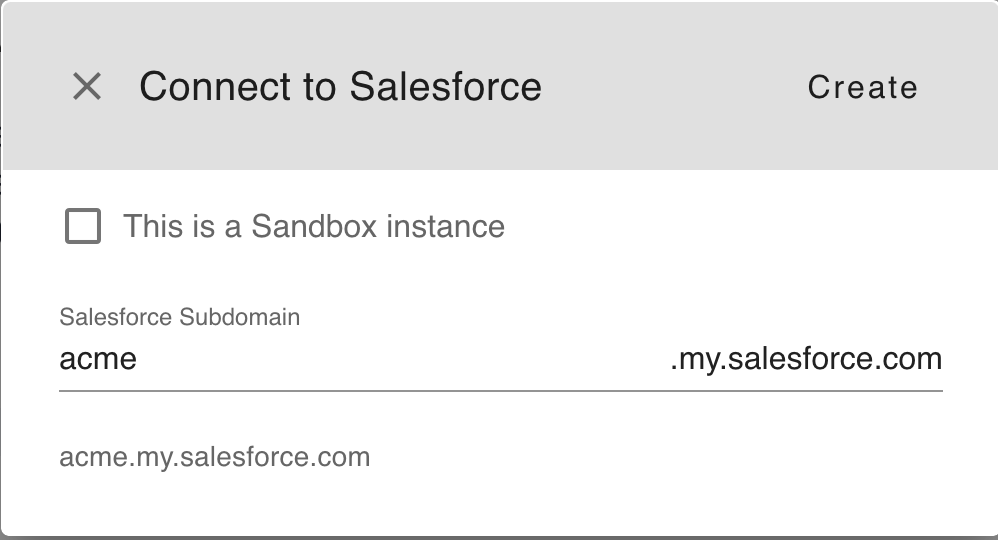
Note that if you are just playing around with a sandbox instance, remember to check "This is a sandbox instance".
A new window will pop up to verify your identity:

Click "Allow" to grant Suger access. After successfully logging in, the window will disappear and the "Status" will become "CREATED".
Now locate the integration in the "Integrations" table, and click "Verify". We will attempt to read a few records to ensure the integration is ready. Once confirmed, the status will turn into "VERIFIED", and you are all set!
Enable the Suger Widget on Opportunity Lightning Page
Edit the Opportunity Lightning Record Page:
On the left, locate the “Suger Opportunity Quick Panel” component:
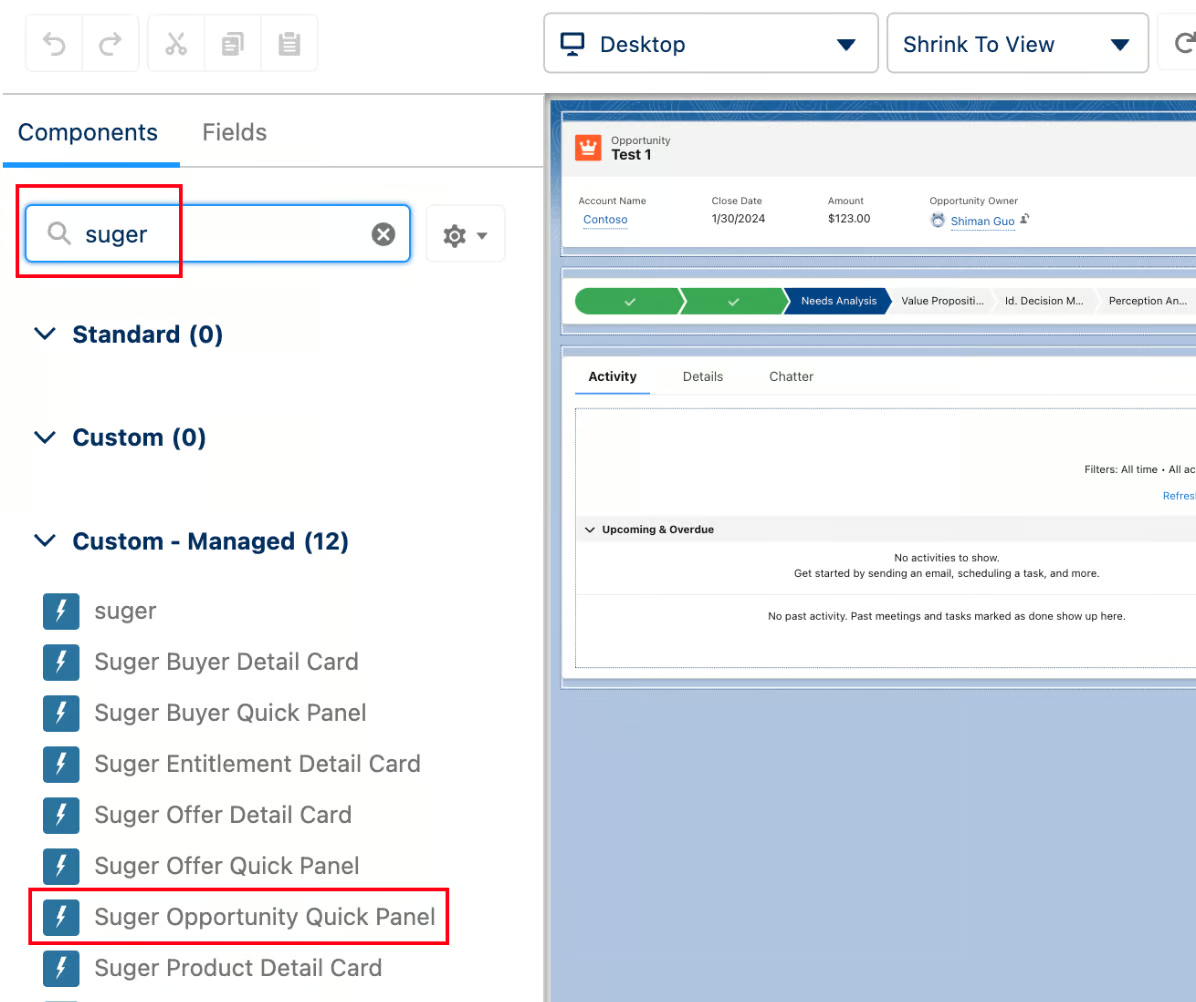
Drag and drop the component to the desired location.
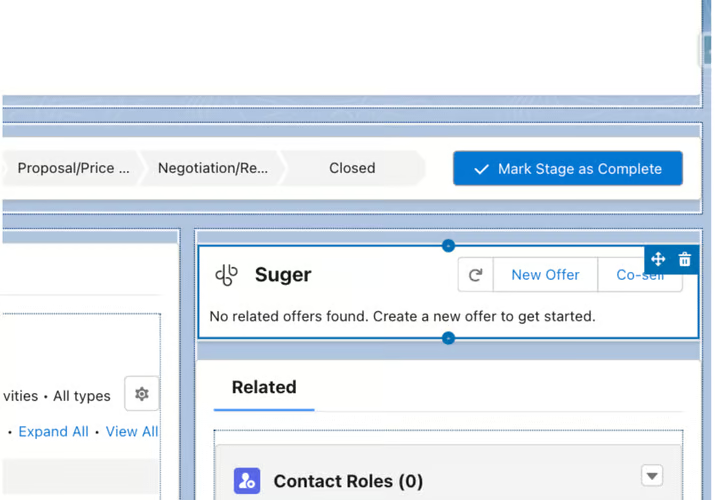
The New Offer and Co-sell buttons will get you started to sell and co-sell 🚀
Assign Permission Set to Target Users
You need to grant your team the correct permission set so that they can invoke the Suger functionalities properly. We provide 3 permission sets:
- Suger User - Marketplace: user will only see the marketplace-related buttons, like
New Offer. - Suger User - Cosell: user will only see buttons for co-sell.
- Suger User: all functionalities available.
For example, if you assign Jane Doe the Suger User - Cosell permission set, she could only see the Co-sell button on the opportunity Suger Widget:

Under the hood, these buttons' visibility is controlled by the following Custom Permissions (under the Suger namespace):
Create OfferCreate Referral.
If you have assigned Jane Doe the Suger User - Cosell permission set, but she is still able to see the New Offer button, please check the following:
- Check the user profile.
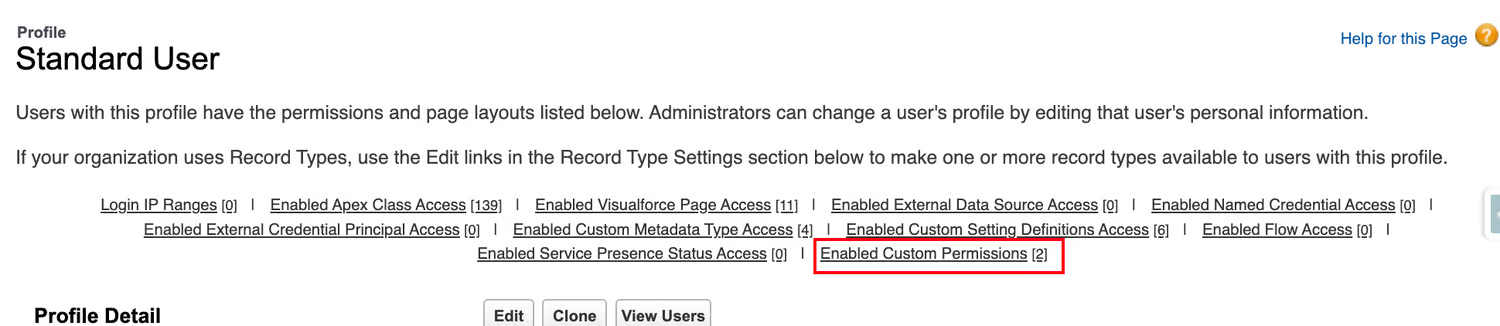
When you install Suger Connector the first time, Salesforce may automatically enable the Custom Permissions on the User Profile level. - Ask the target user to force-refresh the page with
Cmd+rorCtrl+Shift+r.
Delete Integration
To delete the integration, simply click the 🗑️ button in the "Integrations" list. We will remove any credentials in our system.
You can also revoke all access by going to your Salesforce Setup page -> Connected Apps OAuth Usage, click the "User Count" which is normally "1", and then click "Revoke" or "Revoke All".